Day 83: Project 4- Deploying a Web App with Docker Swarm on AWS: Step-by-Step Implementation"

"DevOps enthusiast and aspiring engineer. Currently honing skills in streamlining development workflows and automating infrastructure. Learning AWS, Docker, Kubernetes, Python, and Ansible. Eager to contribute and grow within the DevOps community."
Introduction: In Project 4, we embark on the journey of deploying a web application using Docker Swarm on AWS. Follow along as we set up a robust and scalable environment for hosting applications, walking through each step meticulously.
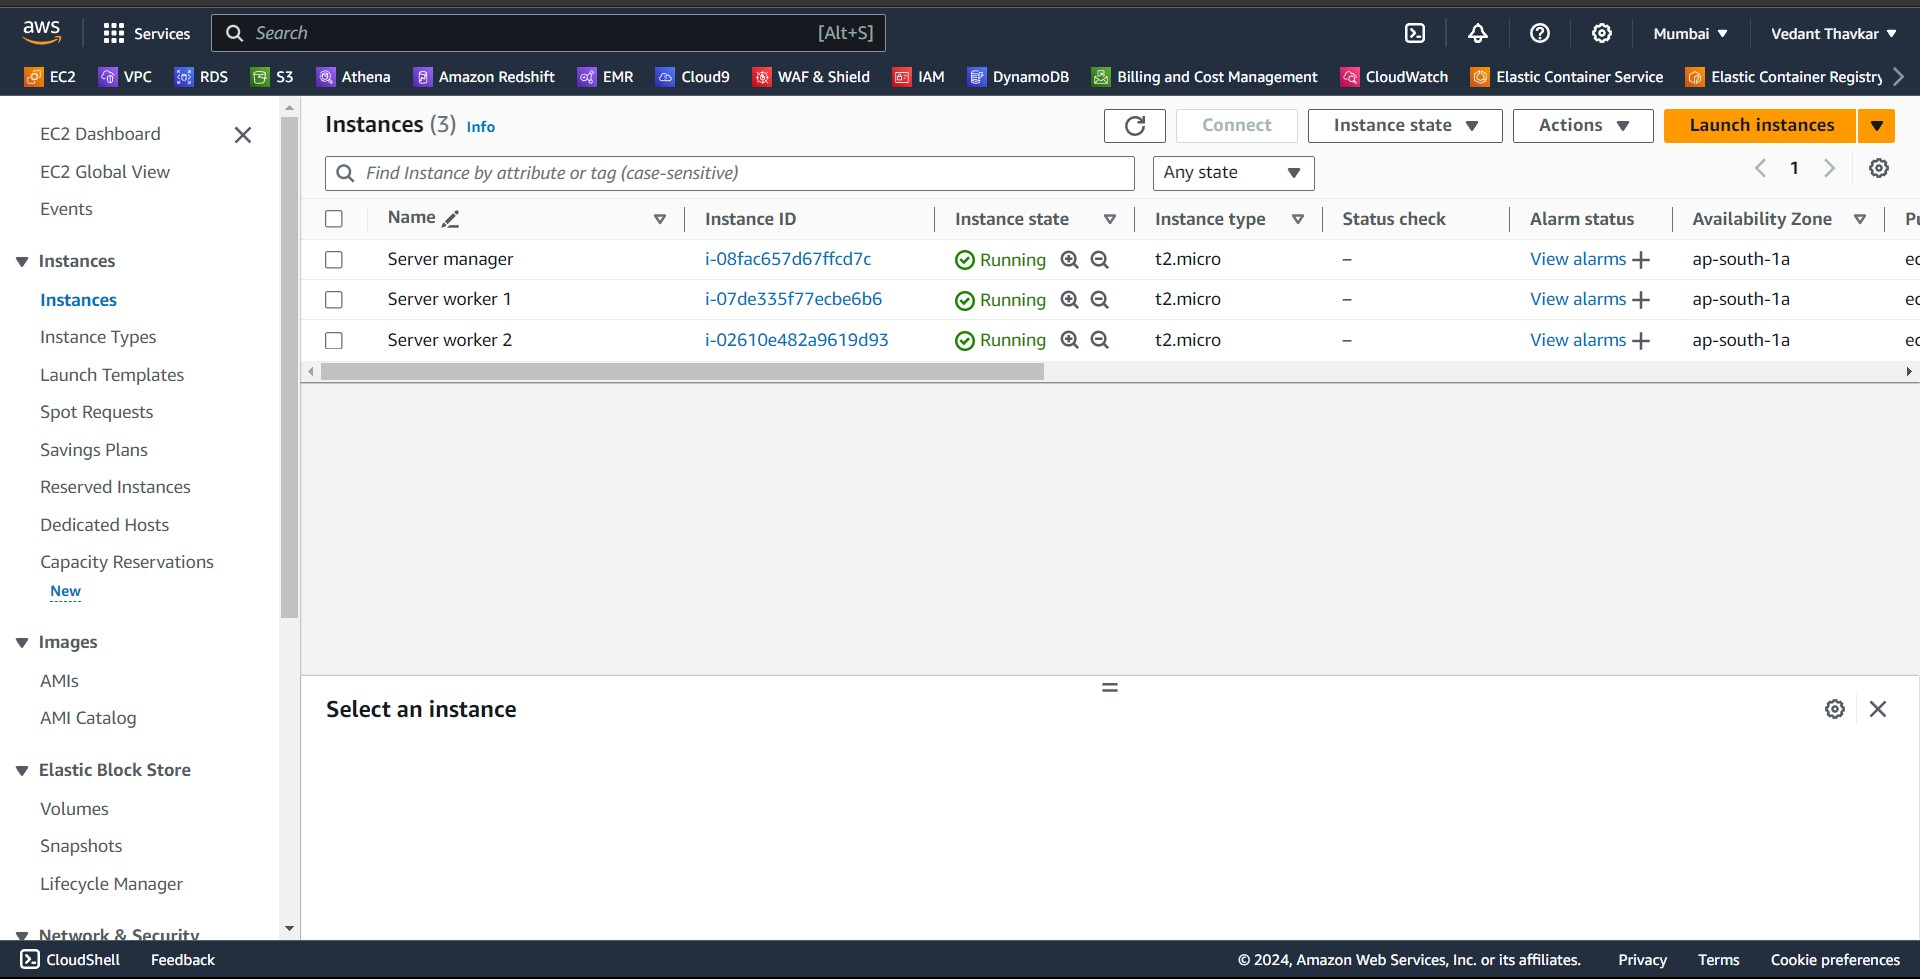
Step 1: Setting Up AWS Instances Begin by navigating to the AWS portal and creating three new instances named Swarm-manager, Swarm-worker1, and Swarm-worker2.
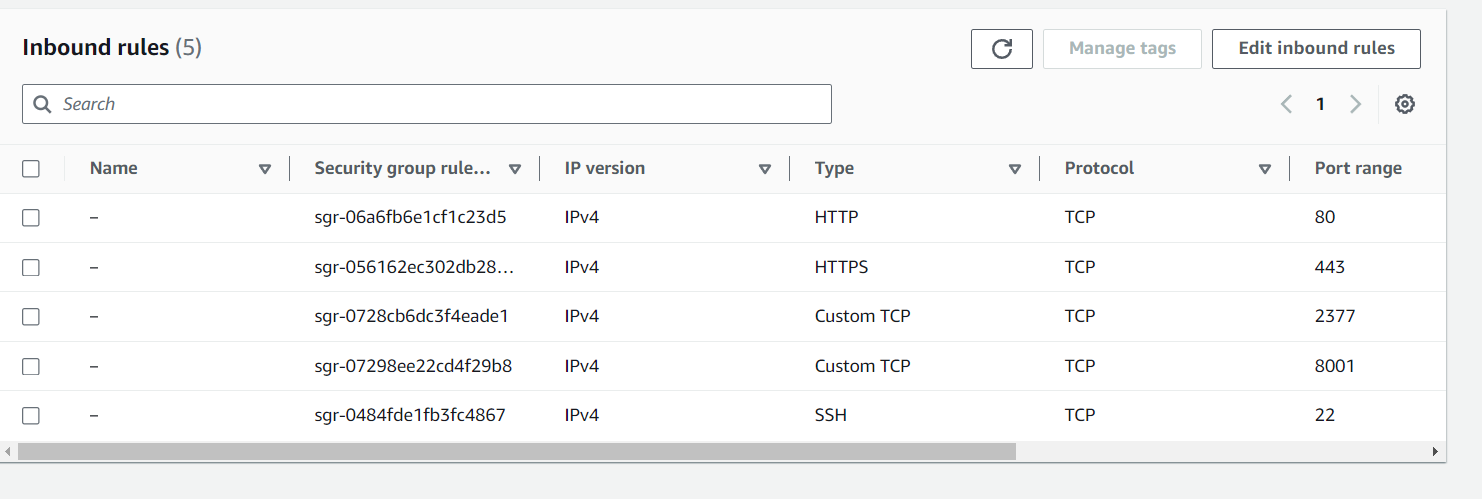
Step 2: Configure Inbound Rules Within the AWS console, ensure that the inbound rules for all instances allow Custom TCP traffic on ports 2377 and 8001 from anywhere (IPv4).
Step 3: Installing Docker Engine On each of the instances, proceed to install Docker Engine. You can refer to other articles or guides for detailed instructions on Docker Engine installation.
https://veddevopsblog.hashnode.dev/day-16-exploring-docker-a-devops-journey
Step 4: Initializing Docker Swarm Log into the Swarm-manager node and initialize Docker Swarm by executing the command: "sudo docker swarm init". This command initializes an empty Docker Swarm.

Step 5: Adding Worker Nodes Upon initializing the swarm, a key will be generated. Copy this key and execute it on the Swarm-worker1 and Swarm-worker2 nodes to add them as worker nodes to the swarm.


Step 6: Verifying Swarm Nodes To ensure all nodes are properly added, run the command "docker swarm node ls" on the Swarm-manager node to list all nodes within the swarm.

Step 7: Creating a Docker Service On the Swarm-manager node, create a Docker service by running the following command: "sudo docker service create --name django-app-service --replicas 3 --publish 8001:8001 trainwithshubham/react-django-app:latest".

Step 8: Listing Docker Services Check the status of Docker services within the swarm by executing "sudo docker service ls" on the Swarm-manager node.

Step 9: Checking Running Containers To verify that the service has successfully created containers across the nodes, execute "sudo docker ps" on any node within the swarm.

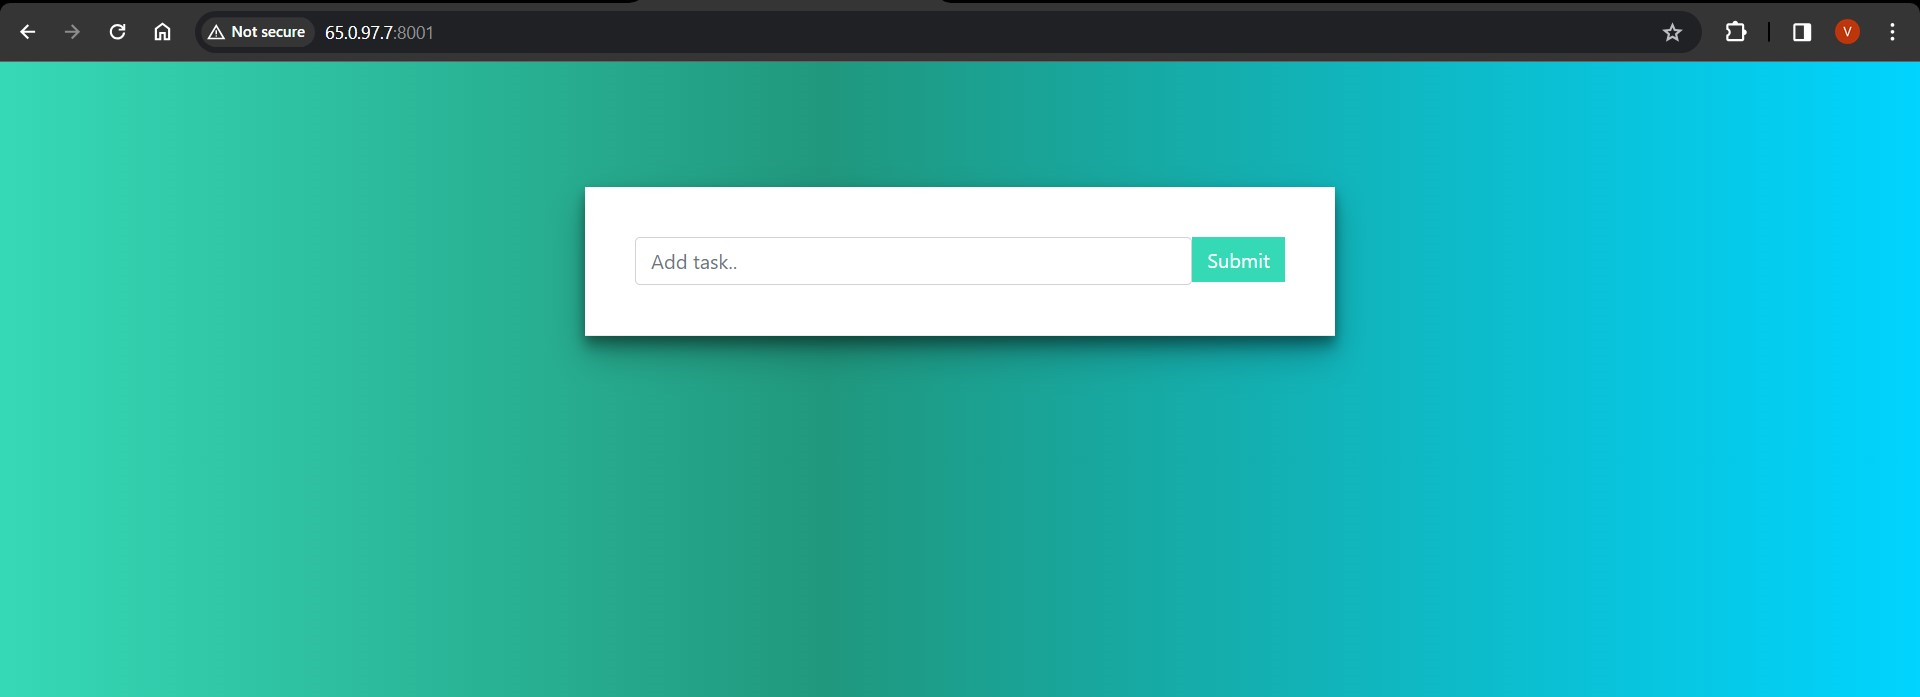
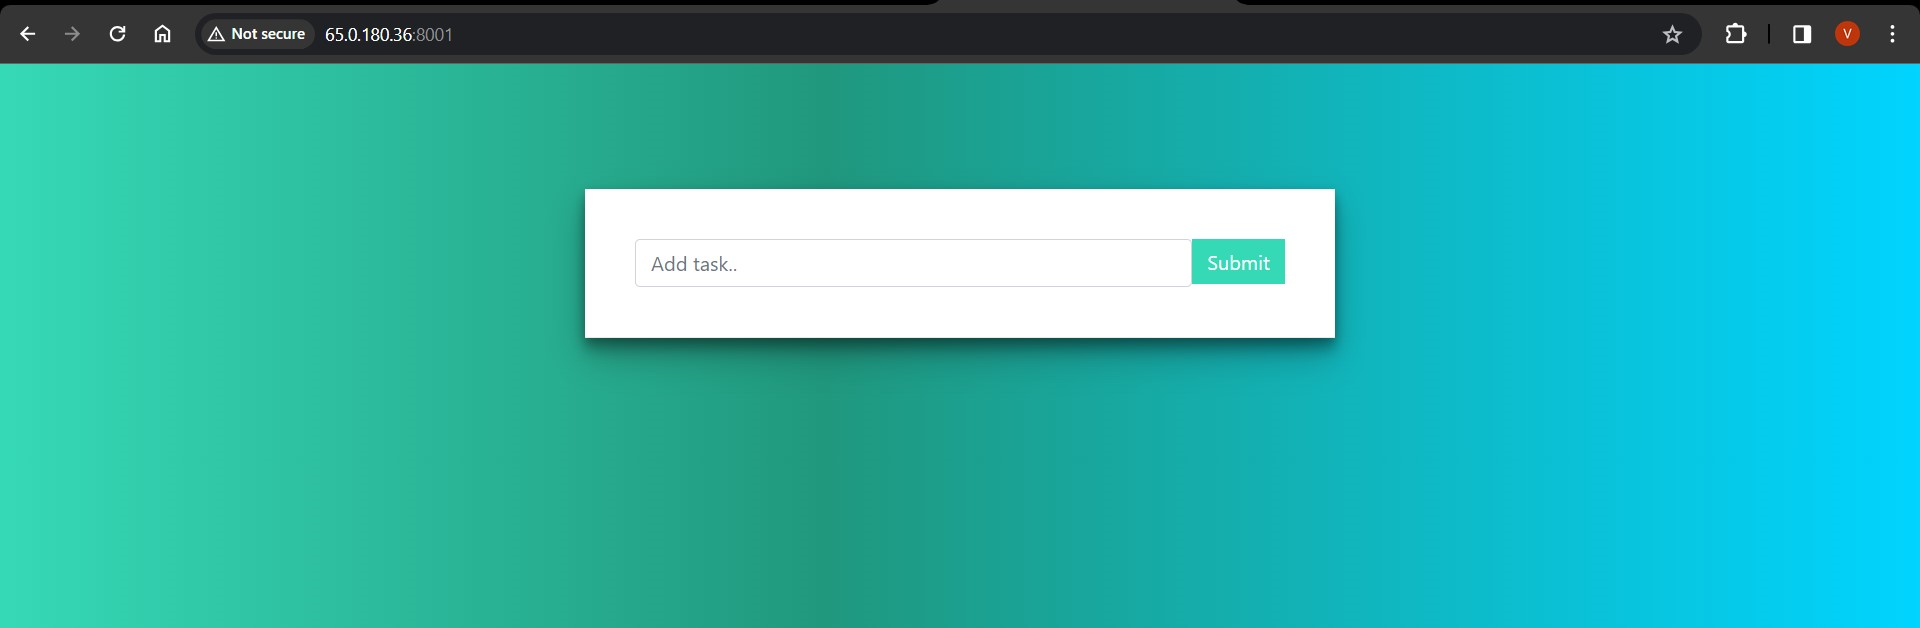
Step 10: Accessing the Web App Access your web application by navigating to the IP address of any node within the swarm followed by port 8001 (e.g., <Any_ip_of_3_vms>:8001).

Step 11: Removing Nodes Should the need arise to remove a node from the environment, utilize the command "sudo docker swarm leave" on the respective worker node. Confirm the node's status using "docker node ls".


Conclusion: Project 4 showcases the seamless deployment of a web application using Docker Swarm on AWS, emphasizing scalability, resilience, and efficient management for your applications. Stay connected for more insightful projects and updates.


