Streamlining TIC TAC TOE Deployment with GitHub Actions: A Comprehensive Guide


In today’s software development landscape, efficiency and automation are paramount. GitHub Actions emerges as a pivotal tool, empowering developers to streamline workflows and enhance collaboration seamlessly. In this guide, we’ll walk through the process of automating the deployment of a TIC TAC TOE game using GitHub Actions, from setting up EC2 instances to integrating SonarQube and deploying to Kubernetes clusters.
Leveraging GitHub Actions for TIC TAC TOE Deployment
GitHub Repository: TIC TAC TOE GitHub Repository
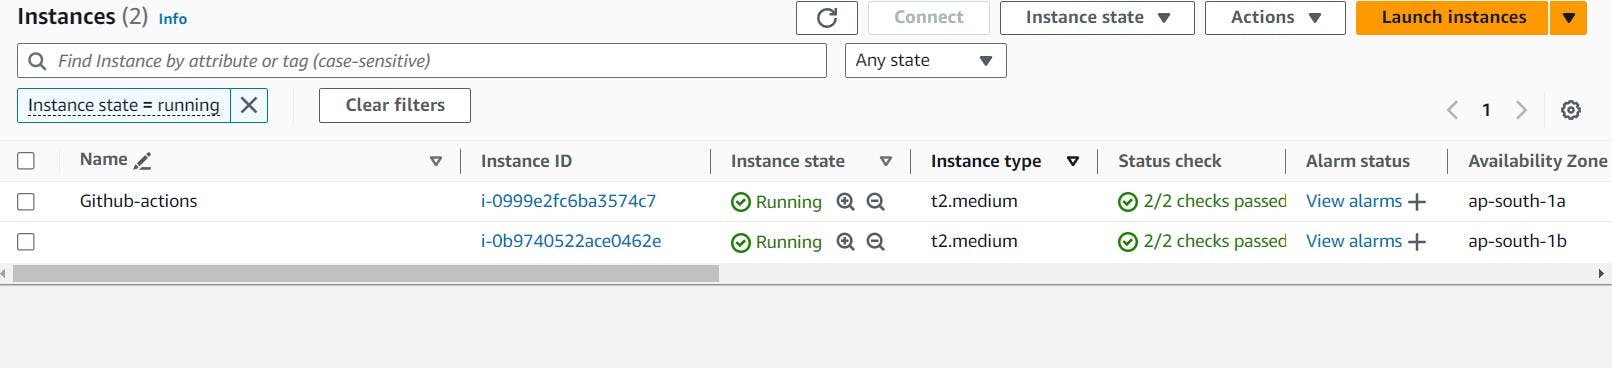
Step 1: Launching an EC2 Instance
Sign in to AWS Management Console: Access the AWS Management Console with your AWS account credentials.
Access EC2 Dashboard: Navigate to the EC2 dashboard.
Launch Instances: Click on "Launch Instances" to initiate the process of launching a new EC2 instance.
Select AMI: Choose "Ubuntu 22.04" as the Amazon Machine Image (AMI) for your instance.
Choose Instance Type: Select "t2.medium" as the instance type in "Step 2."
Configure Instance: Configure instance details, storage, tags, and security group settings according to your requirements.
Review Settings: Review the settings you've configured.
Create or Select Key Pair: Create or select a key pair for secure access to the instance.
Launch Instance: Click "Launch" to launch the instance.
Connect to Instance: Once the instance is launched, connect to it via SSH using the associated key pair.

Associating an IAM Role with an EC2 Instance
Associating an IAM role with an EC2 instance allows the instance to access AWS services securely without the need to store long-term credentials like access keys. Here's how you can associate an IAM role with an EC2 instance:
Navigate to IAM Console: Access the AWS IAM (Identity and Access Management) console from the AWS Management Console.
Create IAM Role: Click on "Roles" in the IAM dashboard, then click "Create role" to initiate the role creation process.

Choose Service: Select "AWS service" as the trusted entity, and then choose "EC2" as the service that will use this role.


Add Permissions Policies: Attach necessary permissions policies to the role based on the permissions required by the EC2 instance. For example, you might attach policies like "AmazonS3FullAccess" or custom policies specific to your application needs.

Provide Role Name: Enter a descriptive name for the IAM role to easily identify its purpose, such as "tic-tac-toe."
Create Role: Once you've configured the role and attached the necessary policies, click on "Create role" to create the IAM role.
Assign Role to EC2 Instance: After creating the IAM role, go back to the EC2 dashboard. Select the instance you launched earlier and navigate to "Actions" -> "Security" -> "Modify IAM role."
Add Newly Created Role: In the "Modify IAM role" dialog, select the IAM role you created from the dropdown menu. This associates the IAM role with the EC2 instance.
Update IAM Role: Click on "Update IAM role" to apply the changes. The EC2 instance is now associated with the IAM role, allowing it to access AWS services securely using the permissions granted to the role.
Step 2: Adding a Self-Hosted Runner to EC2
Access GitHub Settings: Go to GitHub settings and navigate to "Actions" -> "Runners."
Add New Self-Hosted Runner: Click on "New self-hosted runner."

Select Linux and Architecture: Choose "Linux" as the operating system and "X64" as the architecture.
Connect to EC2 Instance: Use SSH to connect to your EC2 instance.
Create Directory: Create a new directory named "actions-runner" and navigate into it.
Download Runner: Download the GitHub Actions runner by running the provided
curlcommand.Validate Installation: Validate the hash installation to ensure the integrity of the downloaded file.
Extract Installer: Extract the downloaded installer.
Configure Runner: Run the configuration script (
config.sh) to configure the runner, providing the GitHub repository URL and a token.Start Runner: Start the runner by running the
run.shscript.
Step 3: Installing Docker and Running SonarQube Container
Connect to EC2 Instance: Connect to your EC2 instance via SSH.
Update Package Repository: Update the package repository using
sudo apt-get update.Install Docker: Install Docker using
sudo apt install docker.io.Add User to Docker Group: Add the current user to the Docker group for running Docker commands without sudo.
Change Docker Socket Permissions: Change permissions of the Docker socket to allow access.
 sudo apt-get update
 sudo apt install docker.io -y
 sudo usermod -aG docker ubuntu
 newgrp docker
 sudo chmod 777 /var/run/docker.sock
Pull SonarQube Image: Pull the SonarQube Docker image from Docker Hub.
docker run -d --name sonar -p 9000:9000 sonarqube:lts-communityRun SonarQube Container: Run the SonarQube container in detached mode, exposing port 9000.
Access SonarQube Dashboard: Access the SonarQube dashboard using the EC2 instance's public IP address and port 9000.
<ec2-public-ip:9000>
Step 4A: Integrating SonarQube with GitHub Actions
Configure SonarQube Project: Configure a project in SonarQube and generate a token for integration with GitHub Actions.

 login admin
 password admin
Update your Sonarqube password & This is the Sonarqube dashboard

Step4B: Integrating SonarQube with GitHub Actions
Integrating SonarQube with GitHub Actions allows you to automatically analyze your code for quality and security as part of your continuous integration pipeline.
We already have Sonarqube up and running
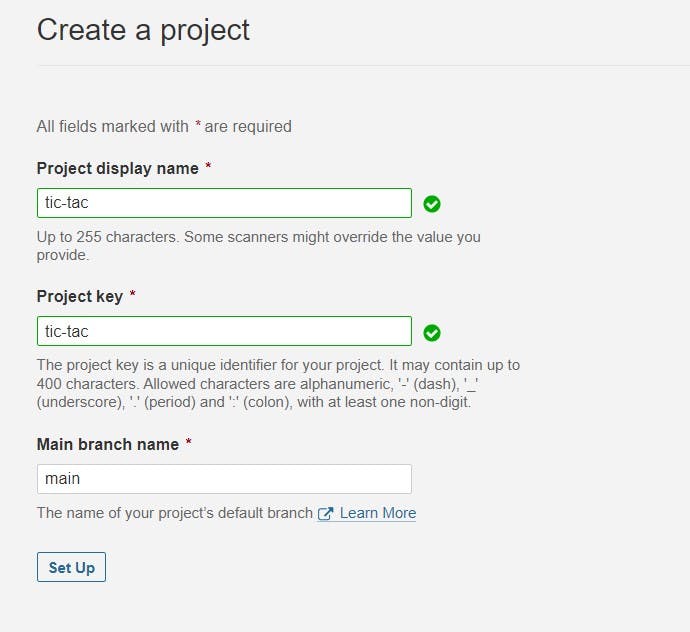
On Sonarqube Dashboard click on Manually
Next, provide a name for your project and provide a Branch name and click on setup
On the next page click on With GitHub actions
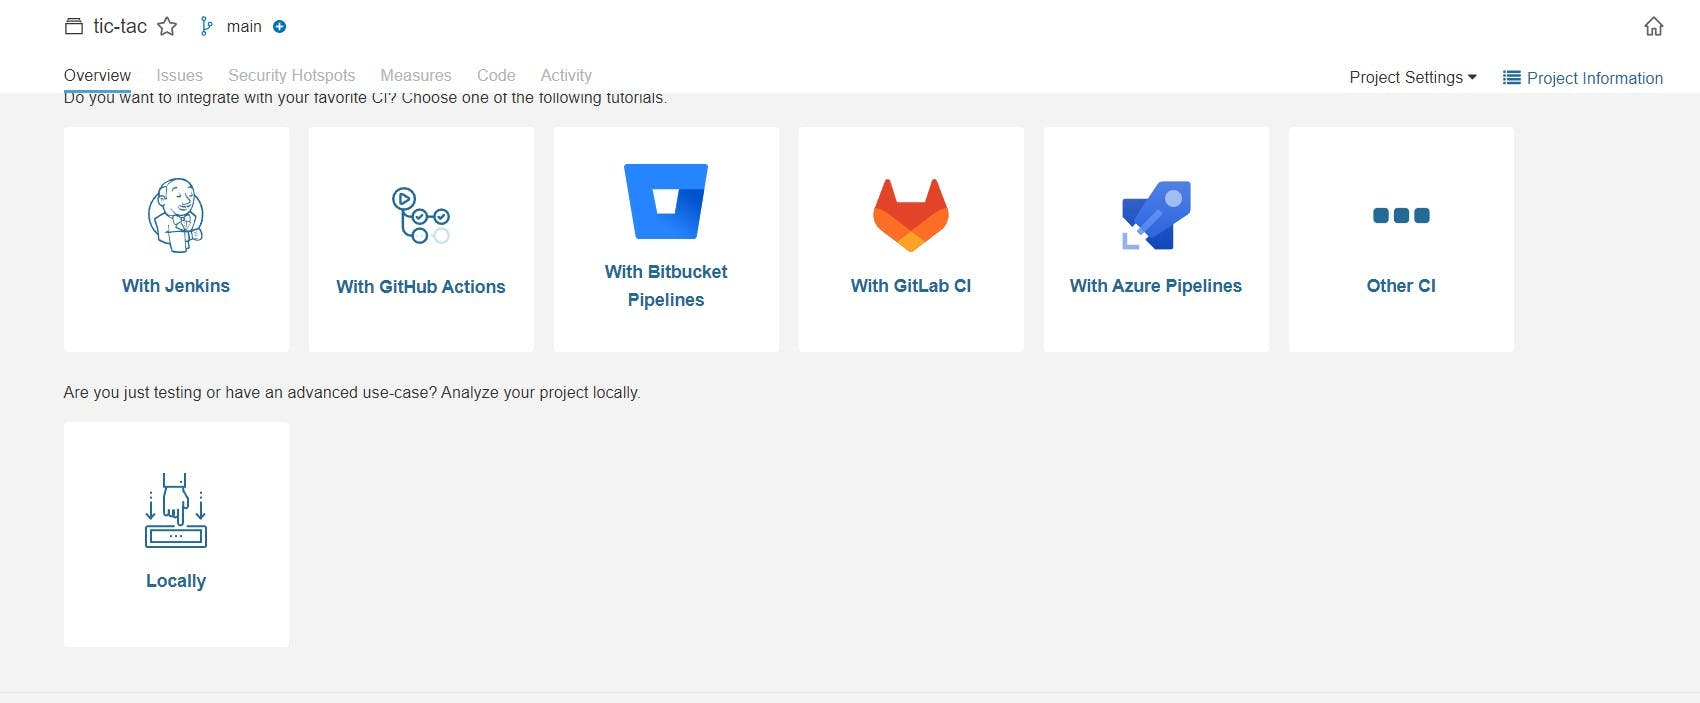
This will Generate an overview of the Project and provide some instructions to integrate

Let’s Open your GitHub and select your Repository

Now go back to Your Sonarqube Dashboard
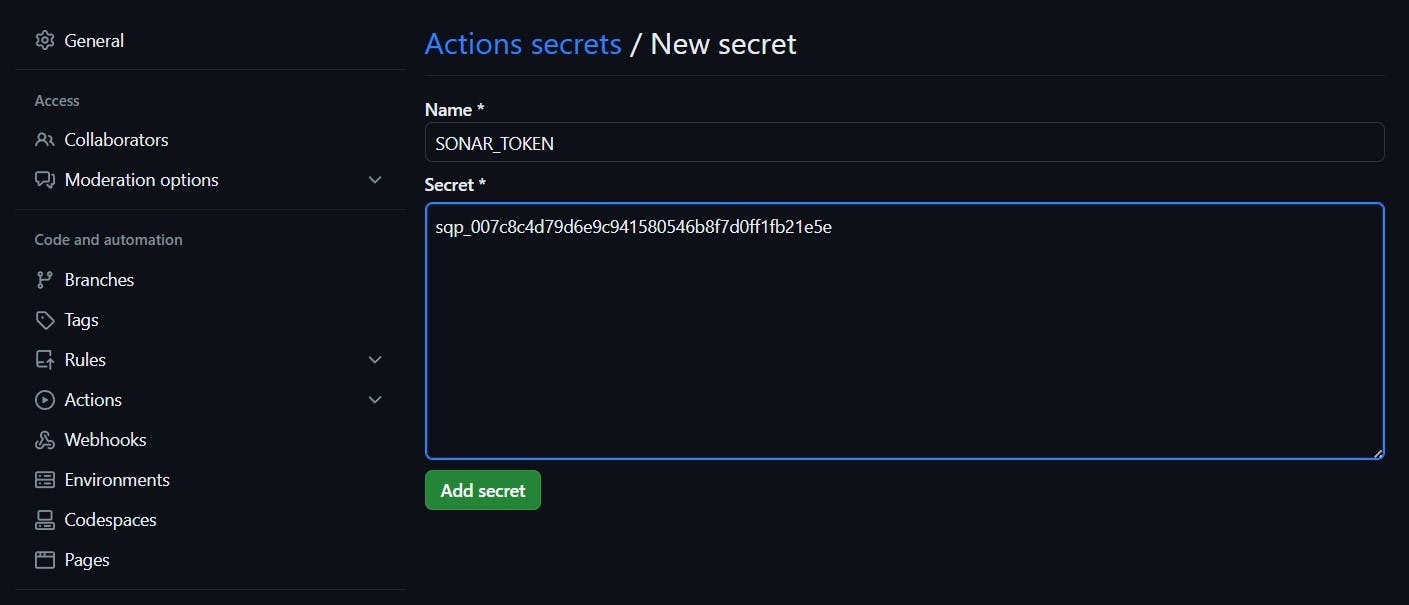
Copy SONAR_TOKEN and click on Generate Token

Now go back to GitHub and Paste the copied name for the secret and token
Name: SONAR_TOKEN
Secret: Paste Your Token and click on Add secret
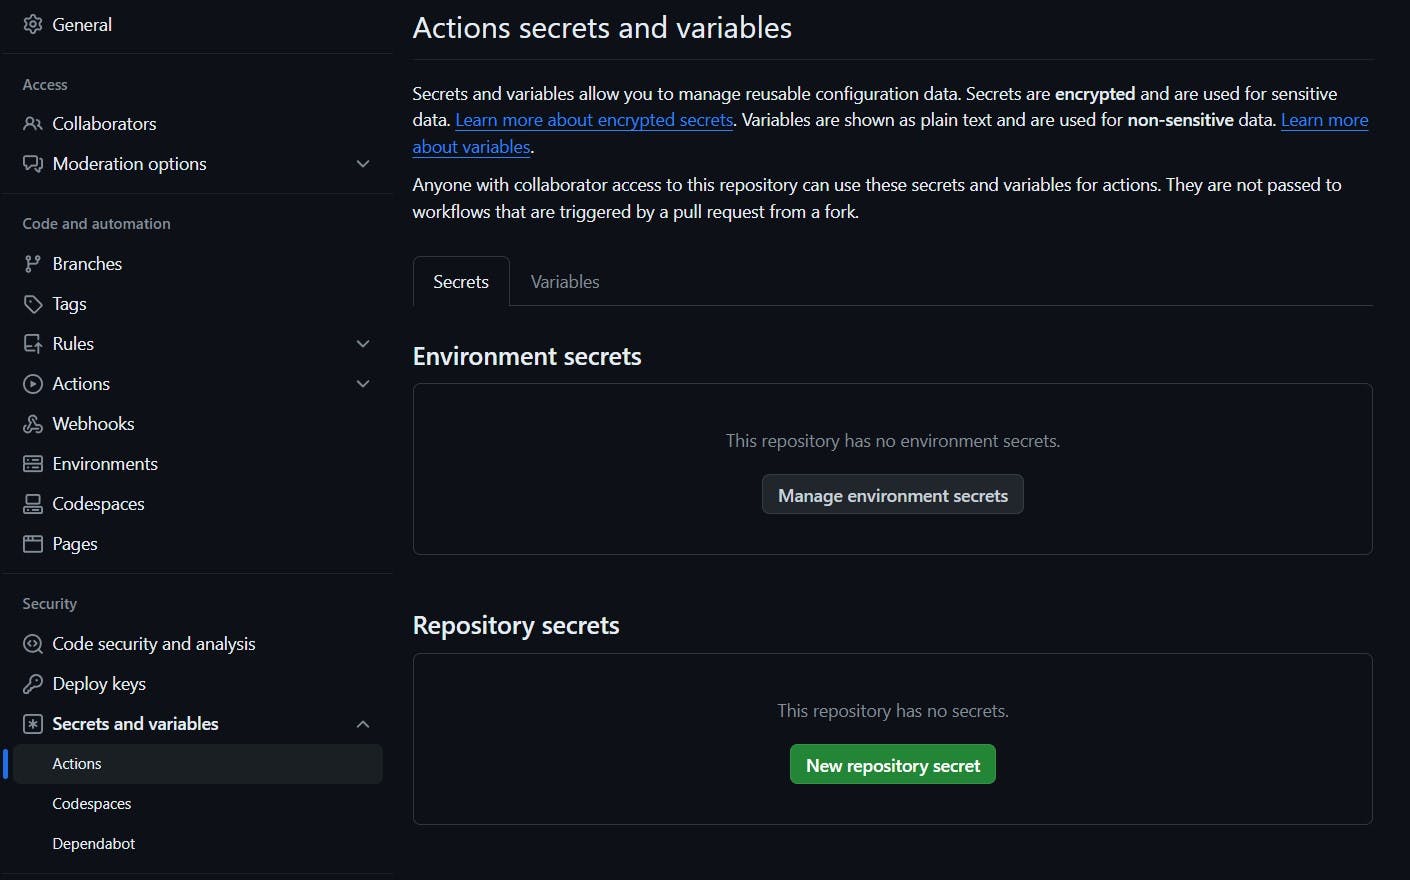
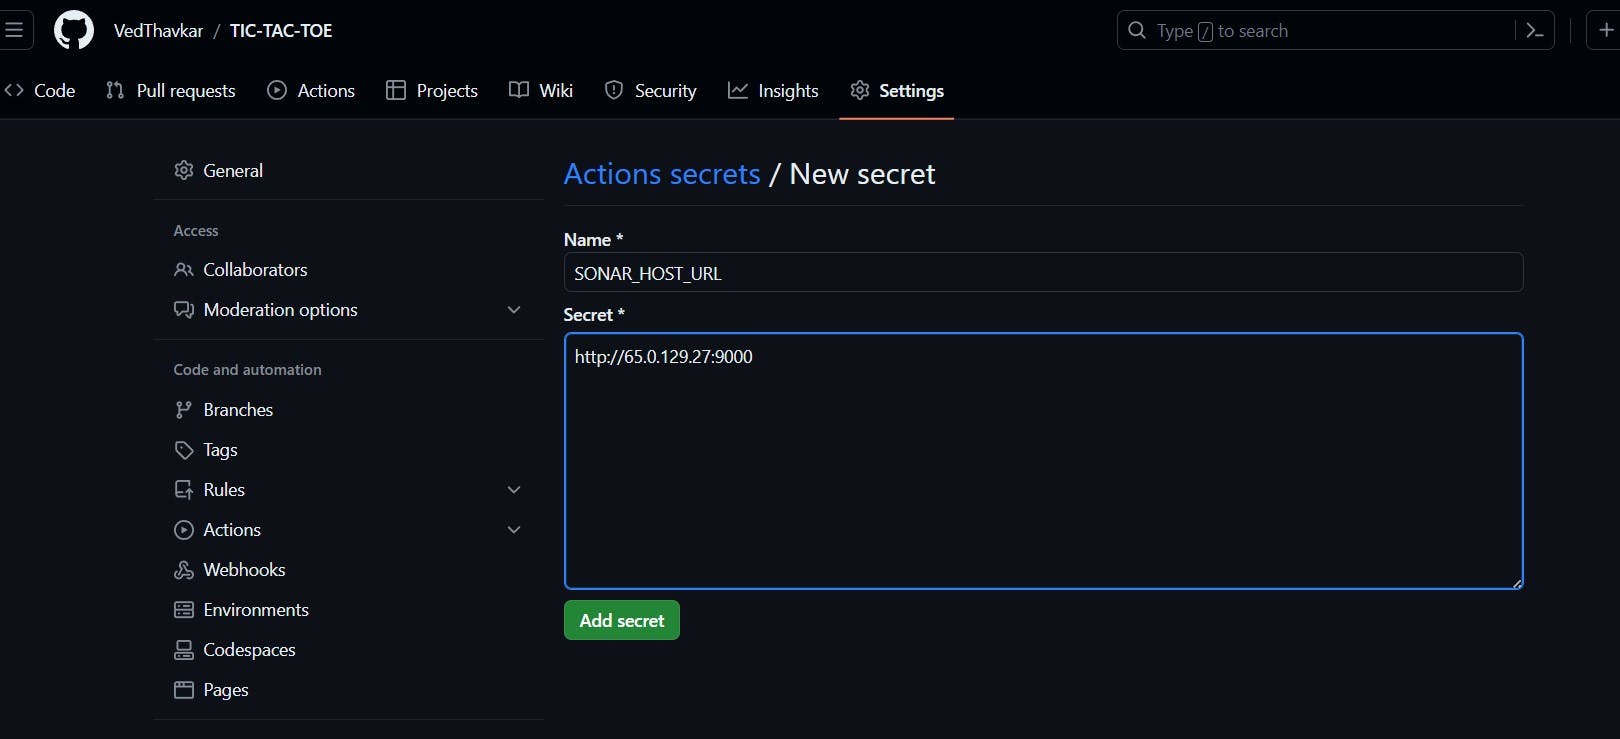
Do same for SONAR_HOST_URL
Now create your Workflow for your Project. In my case, the Netflix project is built using React Js. That’s why I am selecting Other
Now it Generates and workflow for my Project

Go back to GitHub. click on Add file and then create a new file

Go back to the Sonarqube dashboard and copy the file name and content

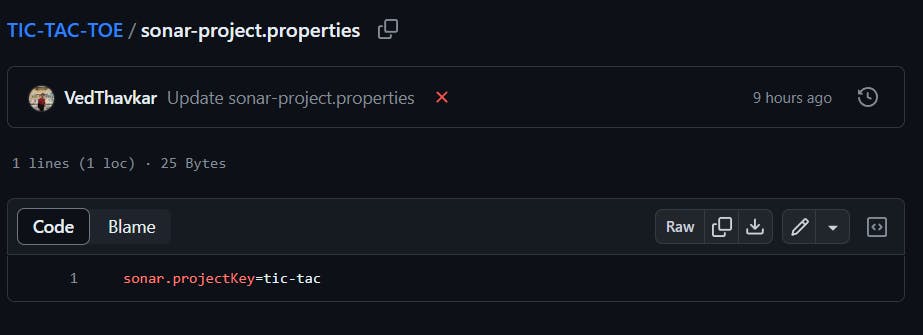
Here file name (in my case only )
sonar-project.propertiesThe content to add to the file is (copied from the above image)
sonar.projectKey=tic-tac
.github/workflows/build.yml #you can use any name iam using sonar.yml

Copy content and add it to the file
name: Build,Analyze,scan

on:
  push:
    branches:
      - main


jobs:
  build-analyze-scan:
    name: Build
    runs-on: [self-hosted]
    steps:
      - name: Checkout code
        uses: actions/checkout@v2
        with:
          fetch-depth: 0  # Shallow clones should be disabled for a better relevancy of analysis

      - name: Build and analyze with SonarQube
        uses: sonarsource/sonarqube-scan-action@master
        env:
          SONAR_TOKEN: ${{ secrets.SONAR_TOKEN }}
          SONAR_HOST_URL: ${{ secrets.SONAR_HOST_URL }}Copy content and add it to the file
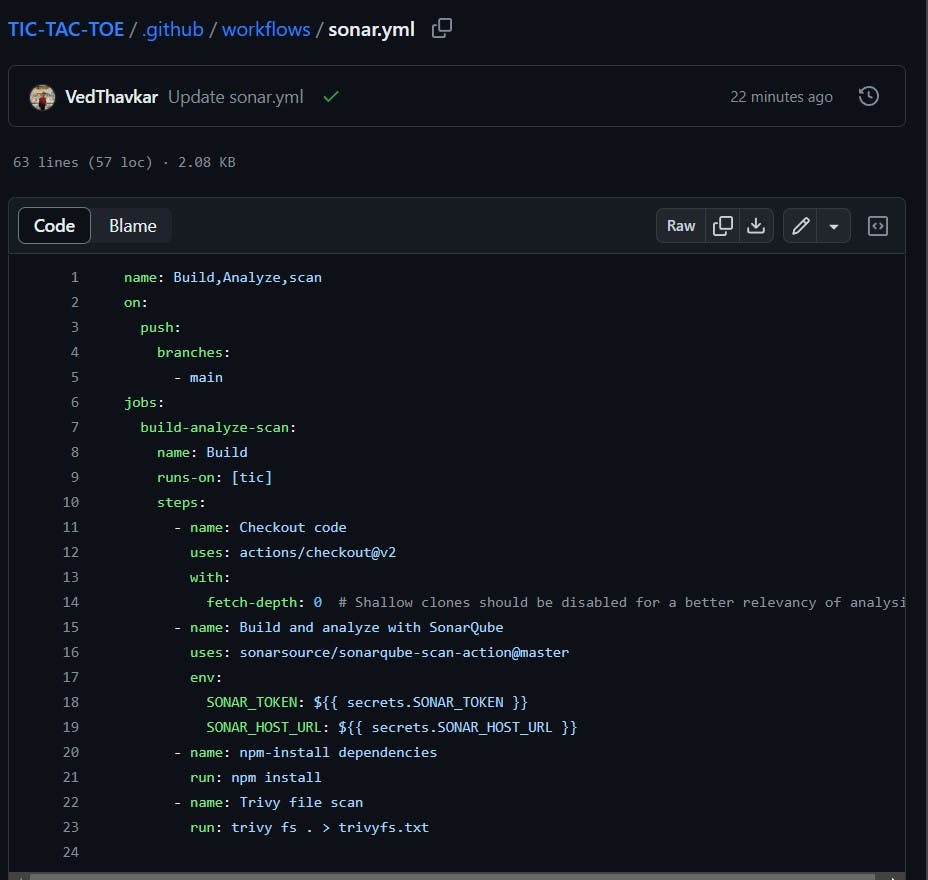
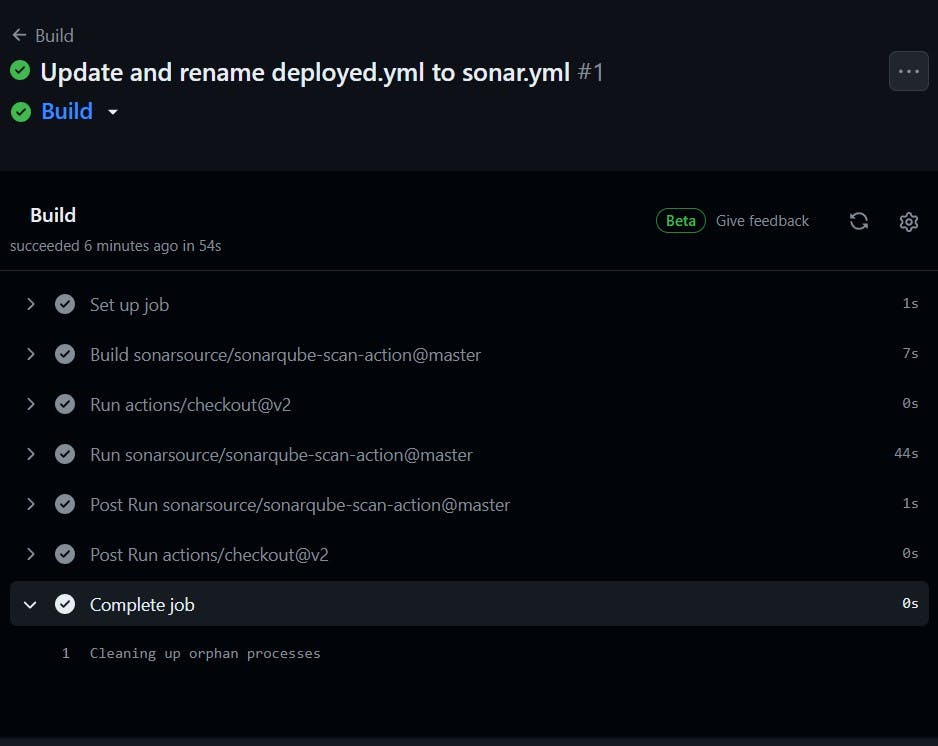
Now workflow is created.
Start again GitHub actions runner from instance
cd actions-runner
./run.sh
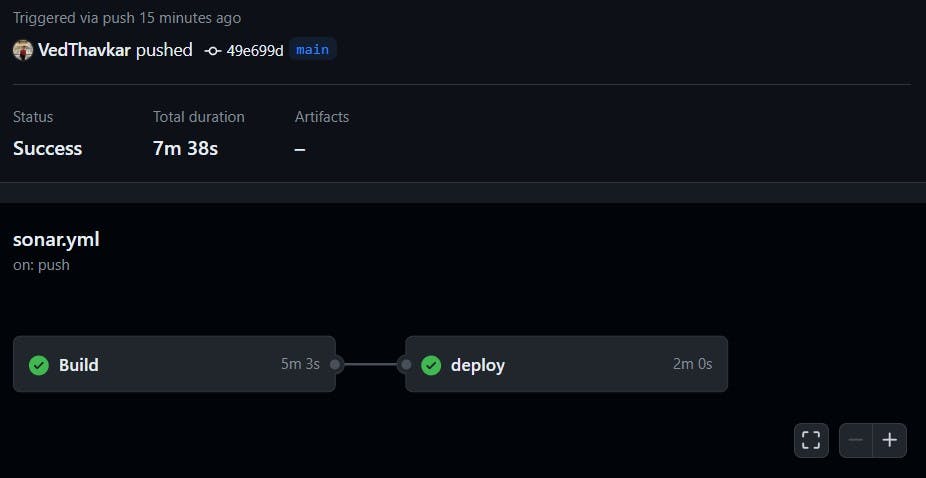
Click on Actions now
Go to the Sonarqube dashboard and click on projects and you can see the analysis

Step 5: Installation of Other Tools
Install Java 17: Install Temurin JDK 17 using the provided script.
Install Trivy: Install Trivy container vulnerability scanner.
Install Terraform: Install Terraform for infrastructure provisioning.
Install kubectl: Install Kubernetes command-line tool.
Install AWS CLI: Install Amazon Web Services Command Line Interface.
Install Node.js 16 and npm: Install Node.js 16 and npm for JavaScript development.
The script automates the installation of these software tools commonly used for development and deployment.
Script
 #!/bin/bash
 sudo apt update -y
 sudo touch /etc/apt/keyrings/adoptium.asc
 sudo wget -O /etc/apt/keyrings/adoptium.asc https://packages.adoptium.net/artifactory/api/gpg/key/public
 echo "deb [signed-by=/etc/apt/keyrings/adoptium.asc] https://packages.adoptium.net/artifactory/deb $(awk -F= '/^VERSION_CODENAME/{print$2}' /etc/os-release) main" | sudo tee /etc/apt/sources.list.d/adoptium.list
 sudo apt update -y
 sudo apt install temurin-17-jdk -y
 /usr/bin/java --version

 # Install Trivy
 sudo apt-get install wget apt-transport-https gnupg lsb-release -y
 wget -qO - https://aquasecurity.github.io/trivy-repo/deb/public.key | gpg --dearmor | sudo tee /usr/share/keyrings/trivy.gpg > /dev/null
 echo "deb [signed-by=/usr/share/keyrings/trivy.gpg] https://aquasecurity.github.io/trivy-repo/deb $(lsb_release -sc) main" | sudo tee -a /etc/apt/sources.list.d/trivy.list
 sudo apt-get update
 sudo apt-get install trivy -y

 # Install Terraform
 sudo apt install wget -y
 wget -O- https://apt.releases.hashicorp.com/gpg | sudo gpg --dearmor -o /usr/share/keyrings/hashicorp-archive-keyring.gpg
 echo "deb [signed-by=/usr/share/keyrings/hashicorp-archive-keyring.gpg] https://apt.releases.hashicorp.com $(lsb_release -cs) main" | sudo tee /etc/apt/sources.list.d/hashicorp.list
 sudo apt update && sudo apt install terraform

 # Install kubectl
 sudo apt update
 sudo apt install curl -y
 curl -LO https://dl.k8s.io/release/$(curl -L -s https://dl.k8s.io/release/stable.txt)/bin/linux/amd64/kubectl
 sudo install -o root -g root -m 0755 kubectl /usr/local/bin/kubectl
 kubectl version --client

 # Install AWS CLI
 curl "https://awscli.amazonaws.com/awscli-exe-linux-x86_64.zip" -o "awscliv2.zip"
 sudo apt-get install unzip -y
 unzip awscliv2.zip
 sudo ./aws/install

 # Install Node.js 16 and npm
 curl -fsSL https://deb.nodesource.com/gpgkey/nodesource.gpg.key | sudo gpg --dearmor -o /usr/share/keyrings/nodesource-archive-keyring.gpg
 echo "deb [signed-by=/usr/share/keyrings/nodesource-archive-keyring.gpg] https://deb.nodesource.com/node_16.x focal main" | sudo tee /etc/apt/sources.list.d/nodesource.list
 sudo apt update
 sudo apt install -y nodejs
Check whether the versions are also installed or not.
 trivy --version
 terraform --version
 aws --version
 kubectl version
 node -v
 java --version
Step 6: EKS Provisioning
Clone Repository: Clone the TIC TAC TOE repository onto your EC2 instance.
 git clone https://github.com/VedThavkar/TIC-TAC-TOE
 cd TIC-TAC-TOE
 cd Eks-terraform
Navigate to EKS Terraform Files: Change directory to the EKS Terraform files.
This changes the directory to EKS terraform files
Update S3 Bucket in Backend File: Update the S3 bucket in the backend file for Terraform state storage.
Initialize Terraform: Initialize Terraform using
terraform init.terraform init
Validate Configuration: Validate the configuration and syntax of Terraform files using
terraform validate.terraform validatePlan and Apply: Plan and apply the Terraform changes using
terraform planandterraform apply.terraform plan terraform apply
It will take 10 minutes to create the cluster

Node group ec2 instance
Now add the remaining steps
Next, install npm dependencies
      - name: NPM Install
        run: npm install # Add your specific npm install command
This step runs npm install to install Node.js dependencies. You can replace this with your specific npm install command.
      - name: Install Trivy
        run: |
          # Scanning files
          trivy fs . > trivyfs.txt
This step runs Trivy to scan files. It scans the current directory (denoted by .) and redirects the output to a file named trivyfs.txt.
Go to docker hub and click on your profile –> Account settings –> security –> New access token.
It asks for a name Provide a name and click on generate token.
Copy the token save it in a safe place, and close.
Now go to the github setting and add token in repository secrets.


      - name: Docker build and push
        run: |
          # Run commands to build and push Docker images
          docker build -t tic-tac-toe .
          docker tag tic-tac-toe vedantthavkar/tic-tac-toe:latest
          docker login -u ${{ secrets.DOCKERHUB_USERNAME }} -p ${{ secrets.DOCKERHUB_TOKEN }}
          docker push vedantthavkar/tic-tac-toe:latest
        env:
          DOCKER_CLI_ACI: 1
This step builds a Docker image with specific build arguments and tags it. It also logs in to Docker Hub using the provided credentials stored in secrets and pushes the Docker image.
Image is pushed to Dockerhub
Deploy
  deploy:
    needs: build-analyze-scan
    runs-on: self-hosted # Use your self-hosted runner label here
This section defines another job named “deploy.” It specifies that this job depends on the successful completion of the “build-analyze-scan” job. It also runs on a self-hosted runner. You should replace self-hosted with the label of your self-hosted runner.
    steps:
      - name: Pull the Docker image
        run: docker pull vedantthavkar/tic-tac-toe:latest
This step pulls the Docker image from Docker Hub, specified by sevenajay/tic-tac-toe:latest, which was built and pushed in the previous “build-analyze-scan” job
      - name: Trivy image scan
        run: trivy image svedantthavkar/tic-tac-toe:latest # Add Trivy scan command here
This step runs Trivy to scan the Docker image tagged as sevenajay/tic-tac-toe:latest. You should add the Trivy scan command here.
      - name: Run the container
        run: docker run -d --name ticgame -p 3000:3000 vedantthavkar/tic-tac-toe:latest
This step runs a Docker container named “ticgame” in detached mode (-d). It maps port 3000 on the host to port 3000 in the container. It uses the Docker image tagged as vedantthavkar/tic-tac-toe:latest.
Open Port in Security Group: Open port in the security group for the Node group instance.
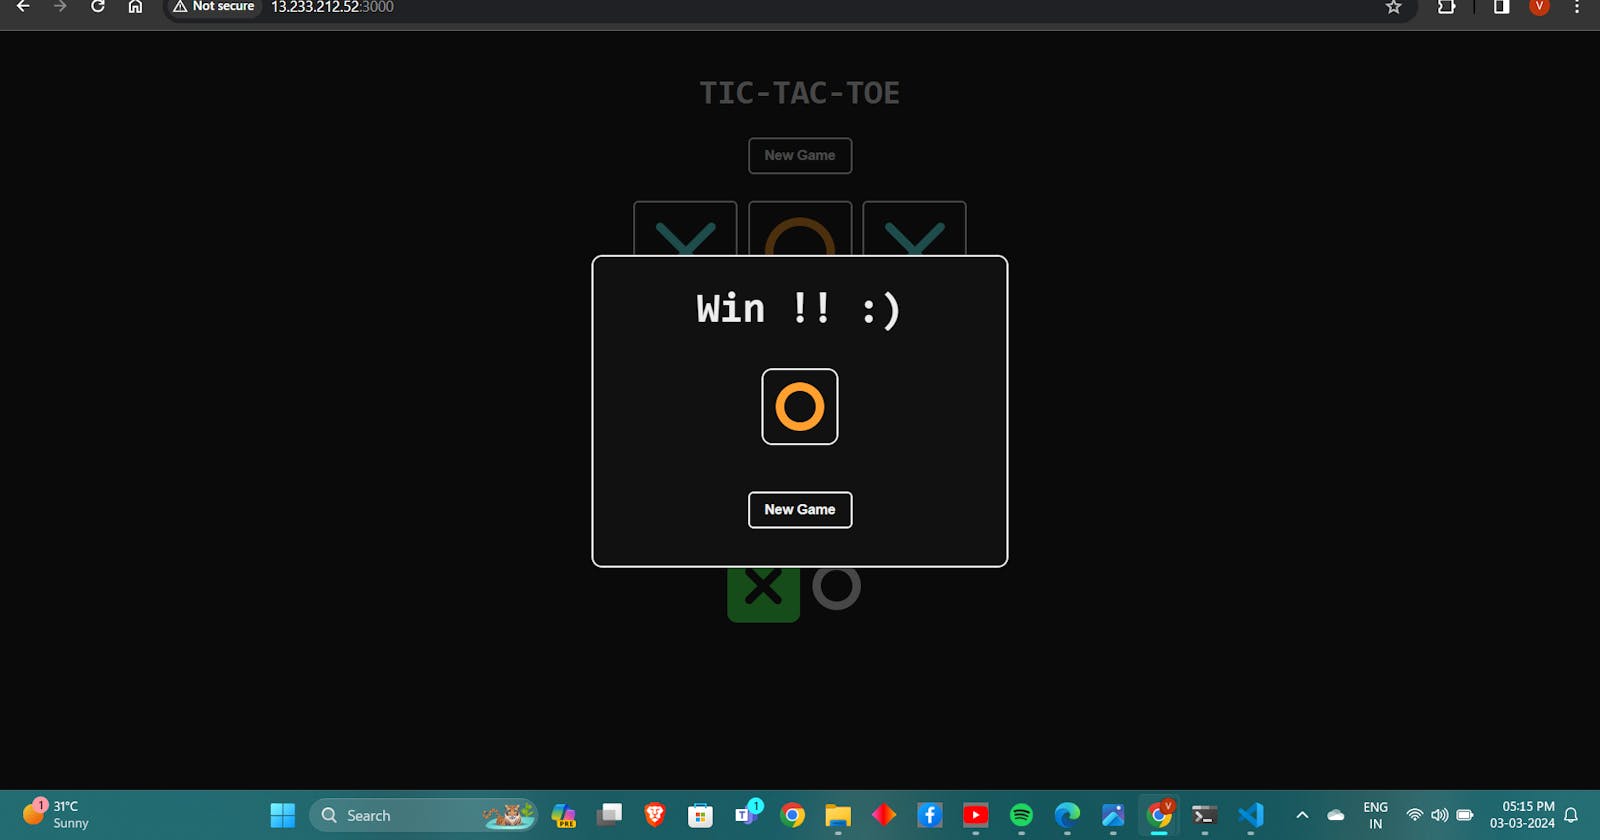
Access TIC TAC TOE: Copy the external IP and paste it into the browser to access the TIC TAC TOE game.
<ec2-ip:3000>Deploy to EKS
       - name: Update kubeconfig
         run: aws eks --region <cluster-region> update-kubeconfig --name <cluster-name>
This step updates the kubeconfig to configure
kubectlto work with an Amazon EKS cluster in the region with the name of your cluster.- name: Deploy to EKS run: kubectl apply -f deployment-service.ymlThis step deploys Kubernetes resources defined in the
deployment-service.ymlfile to the Amazon EKS cluster usingkubectl apply.SLACK
Go to your Slack channel, if you don’t have create one
click on your name
Select Settings and Administration
Click on Manage Apps
It will open a new tab, select build now
Select from scratch
Provide a name for the app and select workspace and create
Select Incoming webhooks
Set incoming webhooks to on
Click on Add New webhook to workspace
Select Your channel that created for notifications and allow
It will generate a webhook URL copy it
Comeback to github and add it the repository secrets.
Add the below code to the workflow and commit and the workflow will start.
      - name: Send a Slack Notification
        if: always()
        uses: act10ns/slack@v1
        with:
          status: ${{ job.status }}
          steps: ${{ toJson(steps) }}
          channel: '#git'
        env:
          SLACK_WEBHOOK_URL: ${{ secrets.SLACK_WEBHOOK_URL }}
This step sends a Slack notification. It uses the act10ns/slack action and is configured to run “always,” which means it runs regardless of the job status. It sends the notification to the specified Slack channel using the webhook URL stored in secrets.
Complete Workflow
```bash name: Build,Analyze,scan
on: push: branches:
- main
jobs: build-analyze-scan: name: Build runs-on: [self-hosted] steps:
name: Checkout code uses: actions/checkout@v2 with: fetch-depth: 0 # Shallow clones should be disabled for a better relevancy of analysis
name: Build and analyze with SonarQube uses: sonarsource/sonarqube-scan-action@master env: SONAR_TOKEN: ${{ secrets.SONAR_TOKEN }} SONAR_HOST_URL: ${{ secrets.SONAR_HOST_URL }}
name: npm install dependency run: npm install
name: Trivy file scan run: trivy fs . > trivyfs.txt
name: Docker Build and push run: | docker build -t tic-tac-toe . docker tag tic-tac-toe vedantthavkar/tic-tac-toe:latest docker login -u ${{ secrets.DOCKERHUB_USERNAME }} -p ${{ secrets.DOCKERHUB_TOKEN }} docker push vedantthavkar/tic-tac-toe:latest env: DOCKER_CLI_ACI: 1
name: Image scan run: trivy vedantthavkar/tic-tac-toe:latest > trivyimage.txt
deploy: needs: build-analyze-scan
runs-on: [self-hosted] steps:name: docker pull image run: docker pull vedantthavkar/tic-tac-toe:latest
name: Image scan run: trivy image vedantthavkar/tic-tac-toe:latest > trivyimagedeploy.txt
name: Deploy to container run: docker run -d --name game -p 3000:3000 vedantthavkar/tic-tac-toe:latest
name: Update kubeconfig run: aws eks --region ap-south-1 update-kubeconfig --name EKS_CLOUD
name: Deploy to kubernetes run: kubectl apply -f deployment-service.yml
name: Send a Slack Notification if: always() uses: act10ns/slack@v1 with: status: ${{ job.status }} steps: ${{ toJson(steps) }} channel: '#tic-tac' env: SLACK_WEBHOOK_URL: ${{ secrets.SLACK_WEBHOOK_URL }}
Job completed.

Let’s go to the Ec2 ssh connection

Provide this command

```bash
kubectl get all
After that copy the external IP and paste it into the browser
output

Step 7: Destruction Workflow
Create Destruction Workflow: Create a workflow to tear down deployed resources safely.
Delete Resources: Use commands to stop containers, delete Kubernetes deployments, and destroy EKS clusters.
Delete Secrets and Instances: Delete Dockerhub tokens, EC2 instances, and IAM roles used in the deployment process.
Conclusion
By following this comprehensive guide, you can automate the deployment of a TIC TAC TOE game using GitHub Actions. From setting up EC2 instances to integrating SonarQube and deploying to Kubernetes clusters, each step is meticulously explained to ensure seamless deployment and efficient workflow automation. Embrace the power of automation and elevate your development process to new heights with GitHub Actions.